HMS Analytics Kit (iOS – Swift)
Huawei AnalyticsKit iOS Example written in Swift
HUAWEI Analytics Kit offers a rich array of preset analytics models that help you gain a deeper insight into your users, products, and content. With this insight, you can then take a data-driven approach to market your apps and optimize your products.
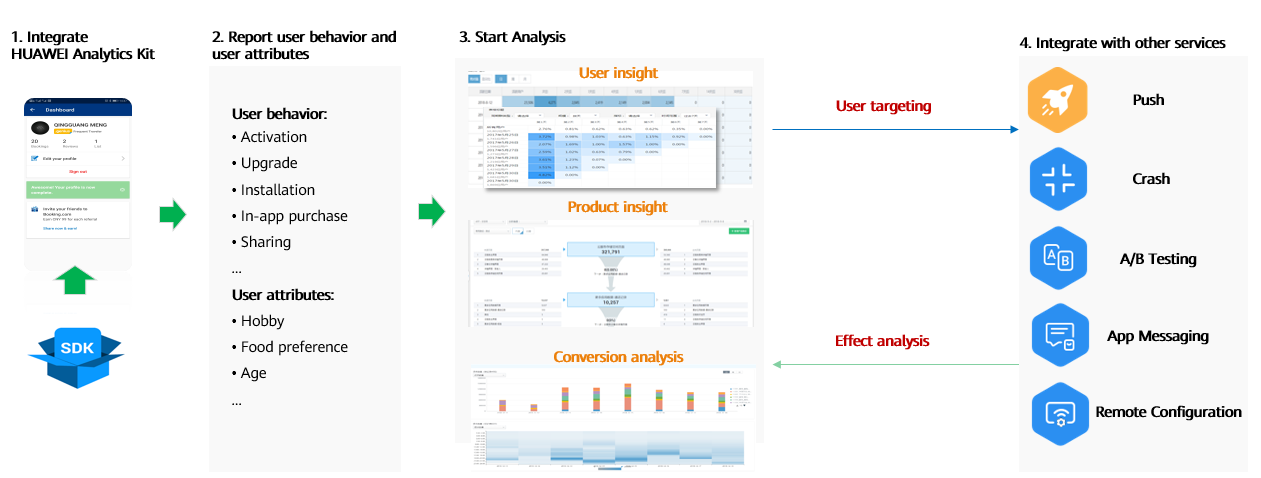
Analytics Kit implements the following functions using data collected from apps:
- Provides data collection and reporting APIs for collection and reporting of custom events.
- Sets up to 25 user attributes.
- Supports automatic event collection and session calculation as well as predefined event IDs and parameters.
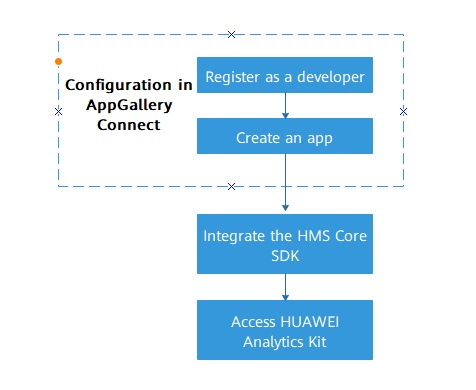
To use AnalyticsKit we have several steps to do.
After registering and creating an app on AppGallery, we are going to cover how to integrate the HMS Core SDK, how to import AnalyticsKit and use AnalyticsKit APIs.
Create an App and a Project
Firstly, create an app and a project, and add the app to the project. And enable Analytics Service. You can check detailed instructions in Creating an AppGallery Connect Project and Adding an App to the Project.
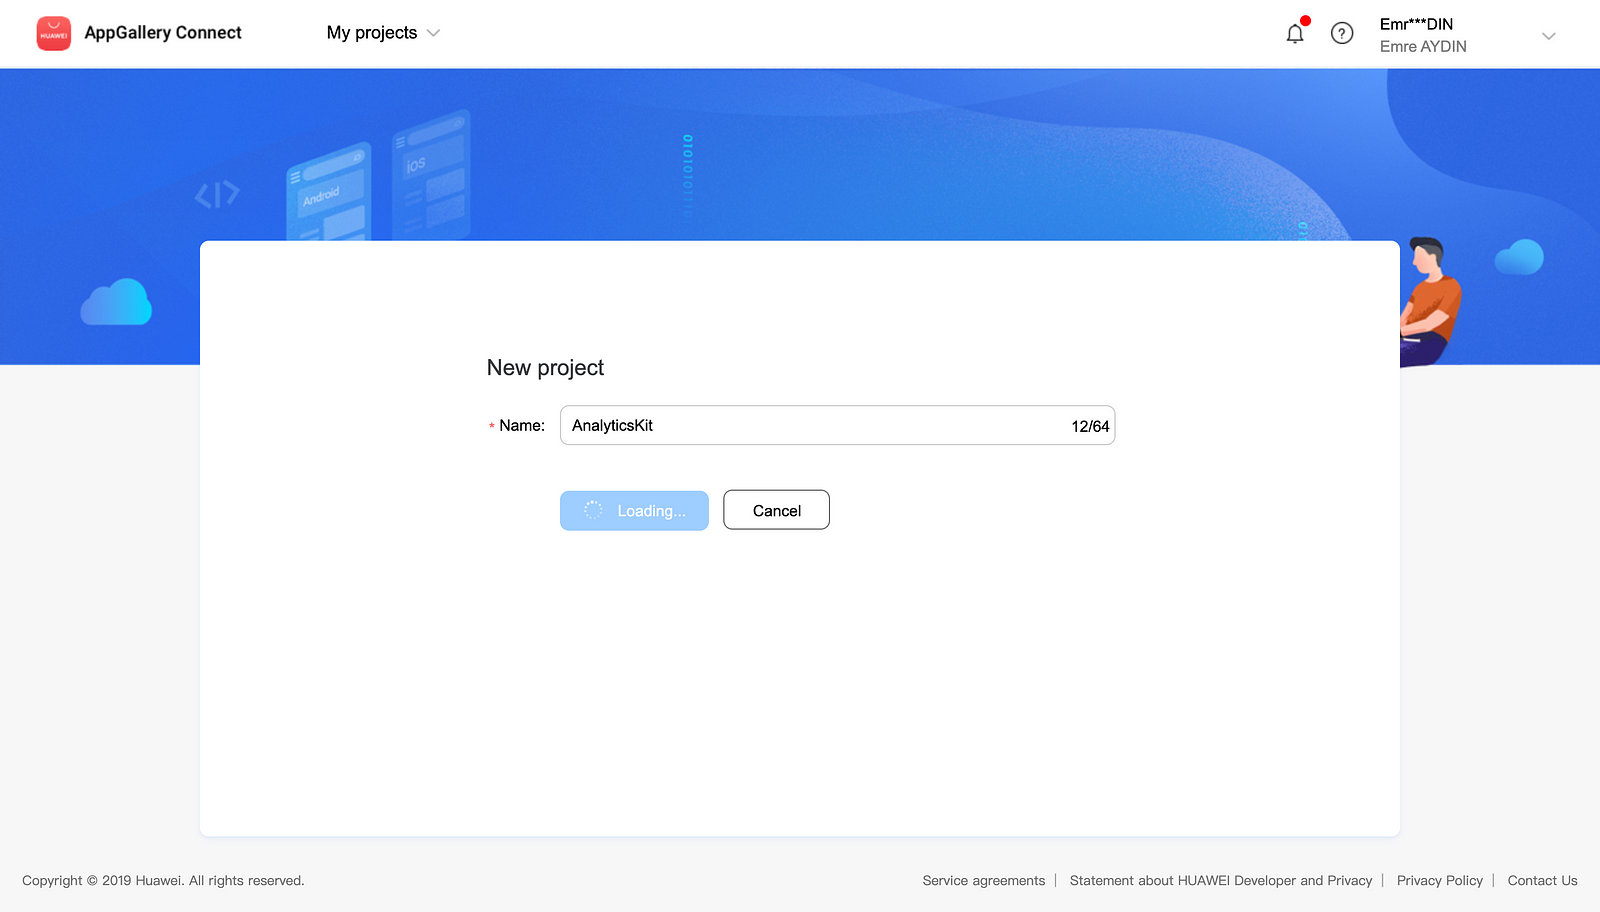
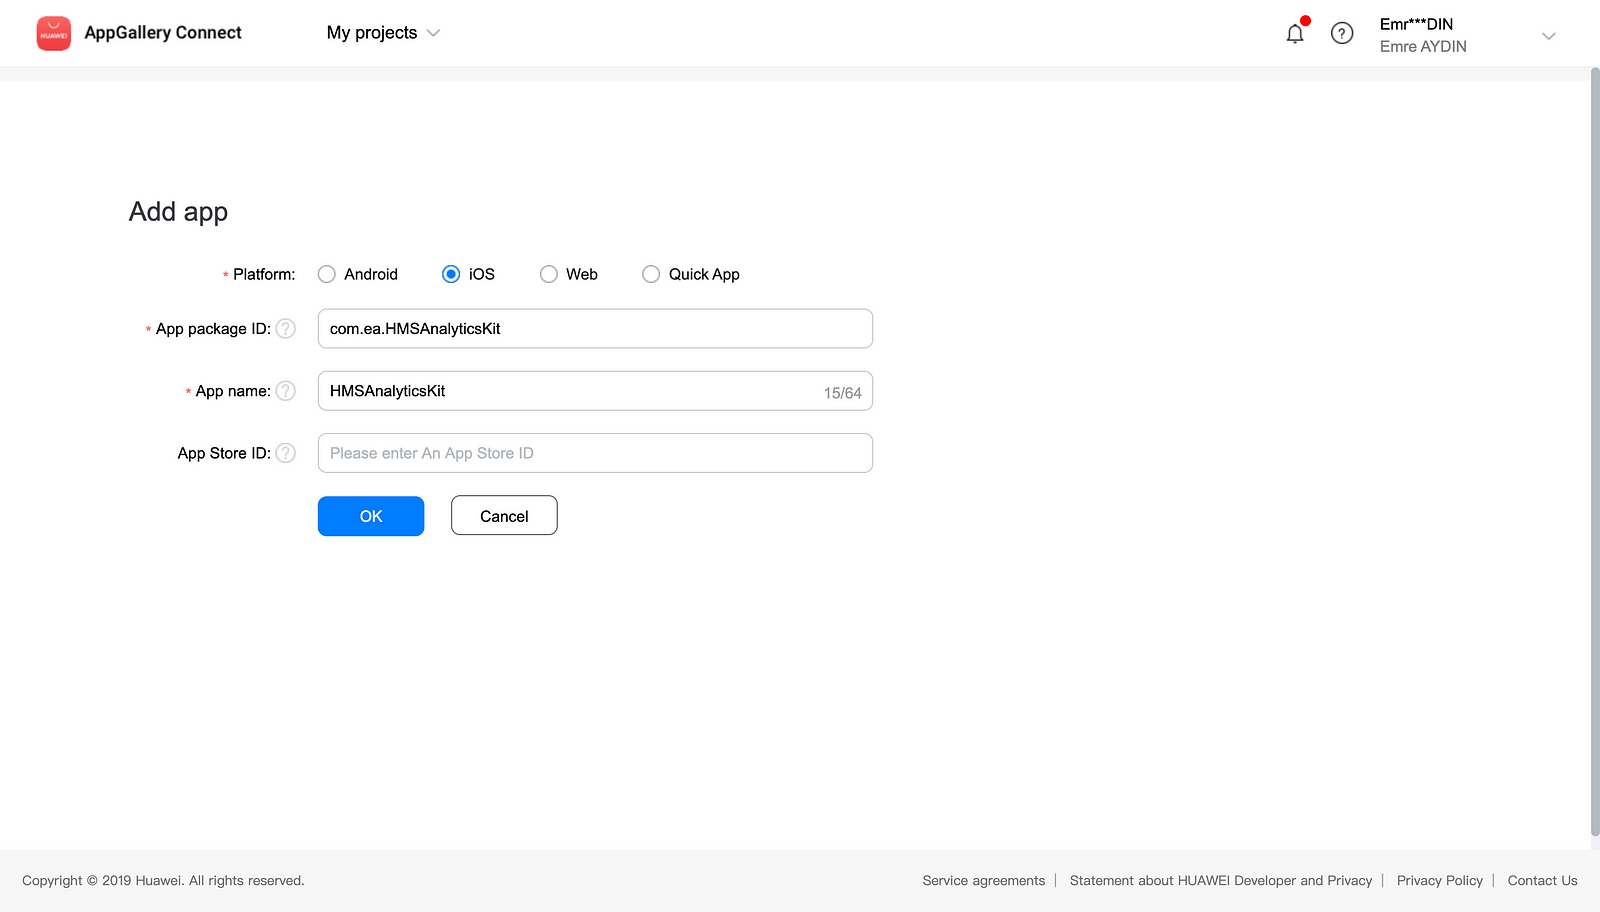
After creating your app and adding it to a project we have to enable Analytics Kit.

Select any menu under HUAWEI Analytics and click Enable Analytics service.
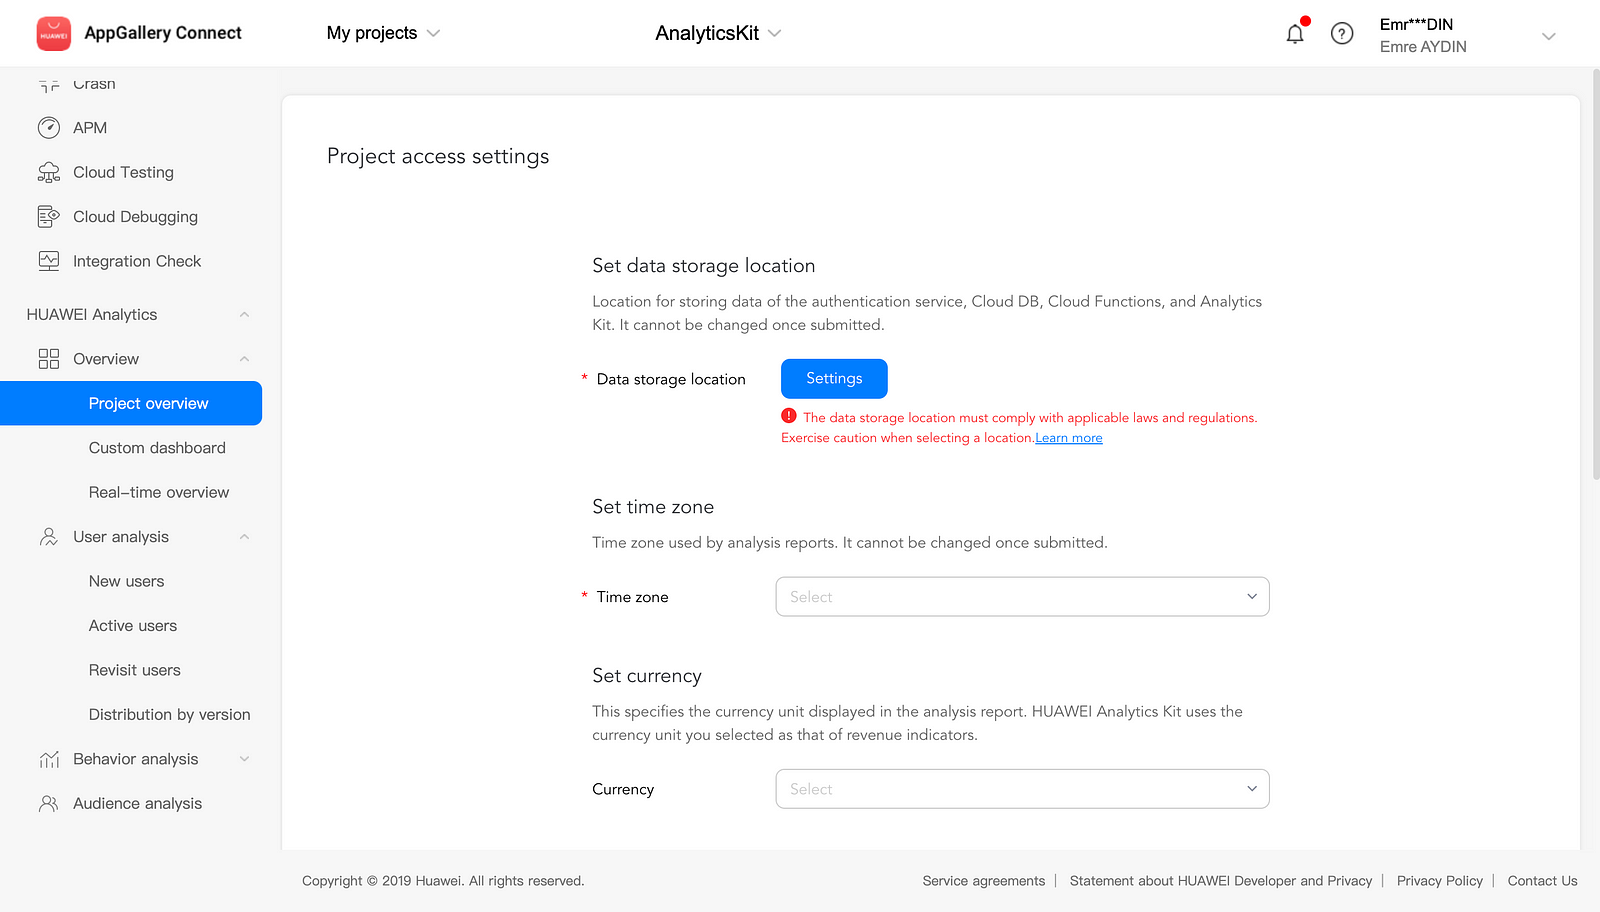
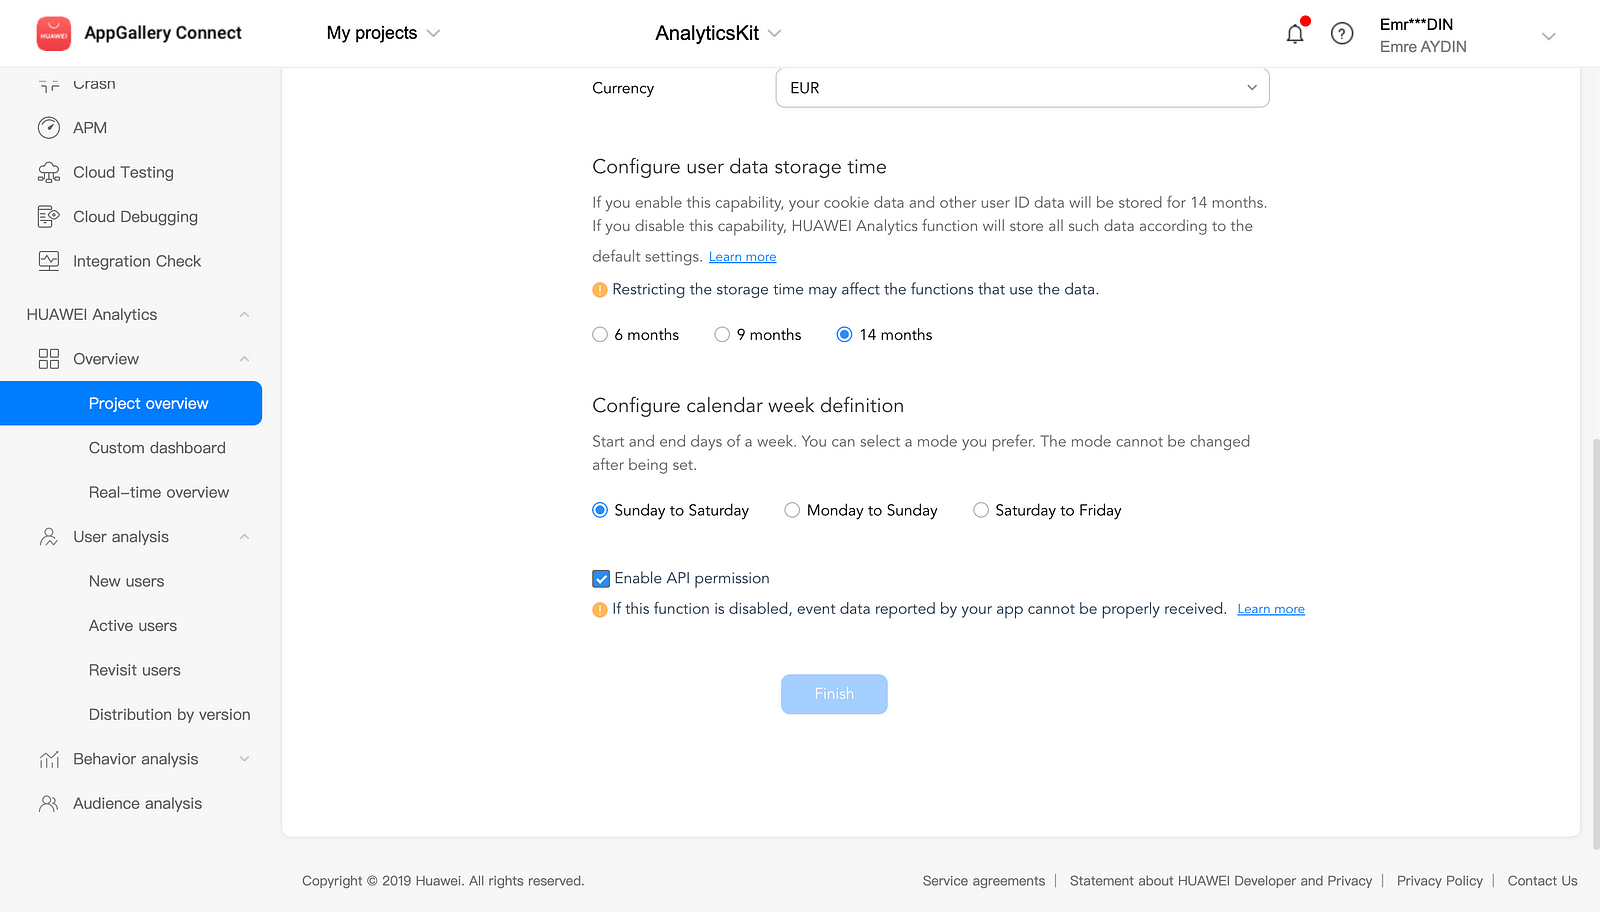
On the Project access settings page, set the data storage location, time zone, currency, user data storage time, and calendar week, and click Finish.
Integrating the HMS Core SDK
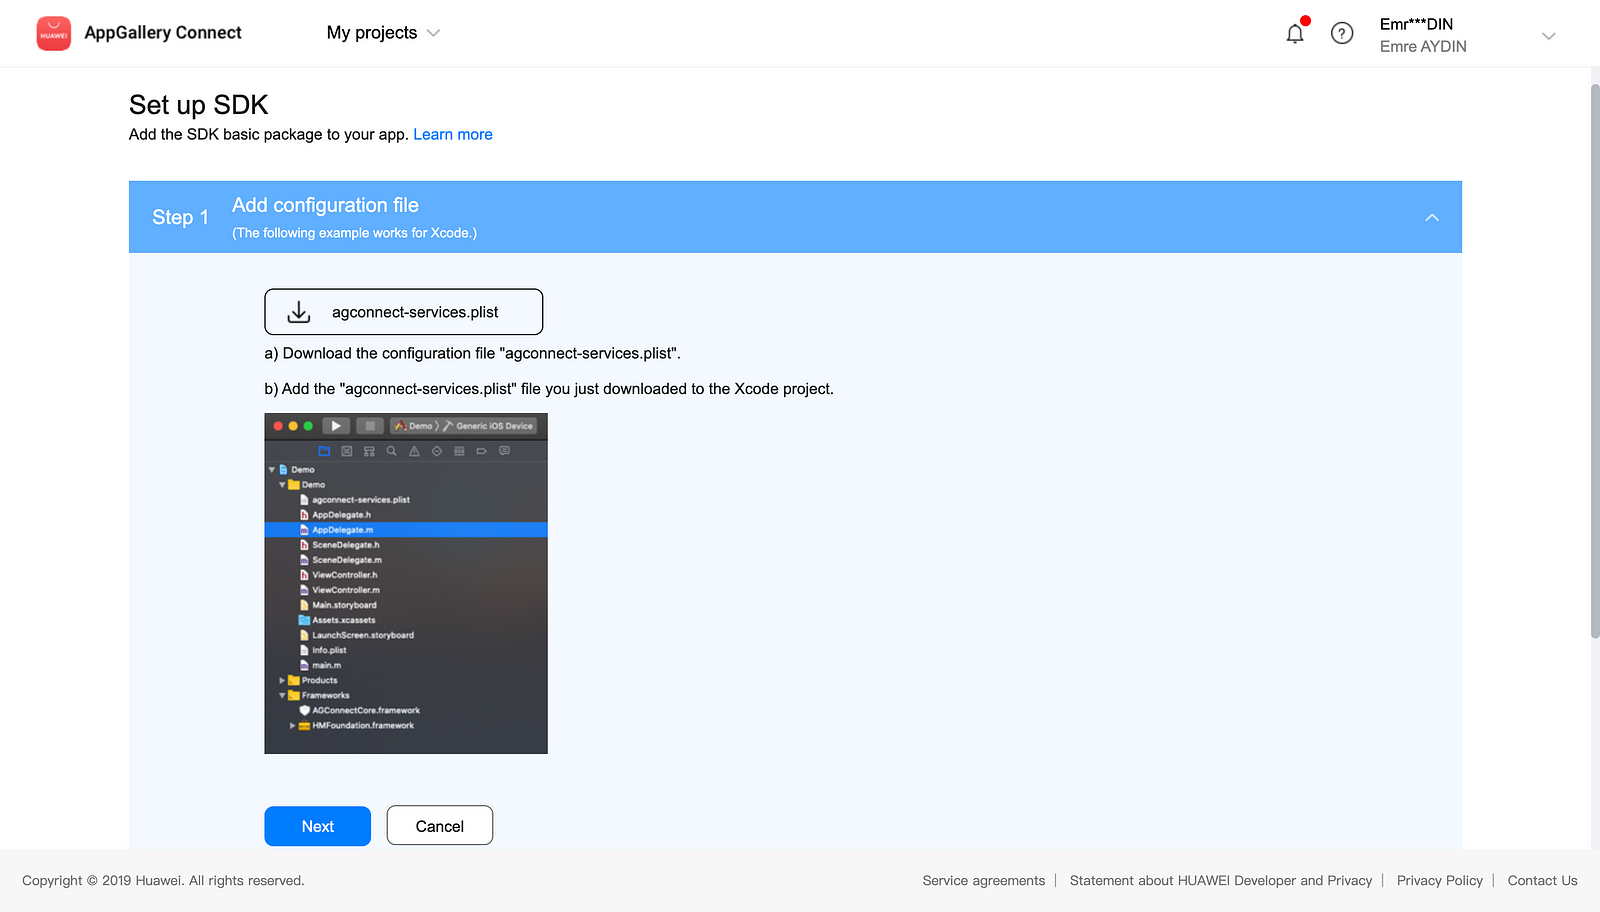
Go to Project Setting > App information. In the App information area, download the agconnect-services.plist file. And add it to your Xcode project.
Create a Podfile (If you don’t have).
$ cd your-project-directory
$ pod init
Edit the Podfile to add pod dependencies:
Finally, run the code below:
$ pod install
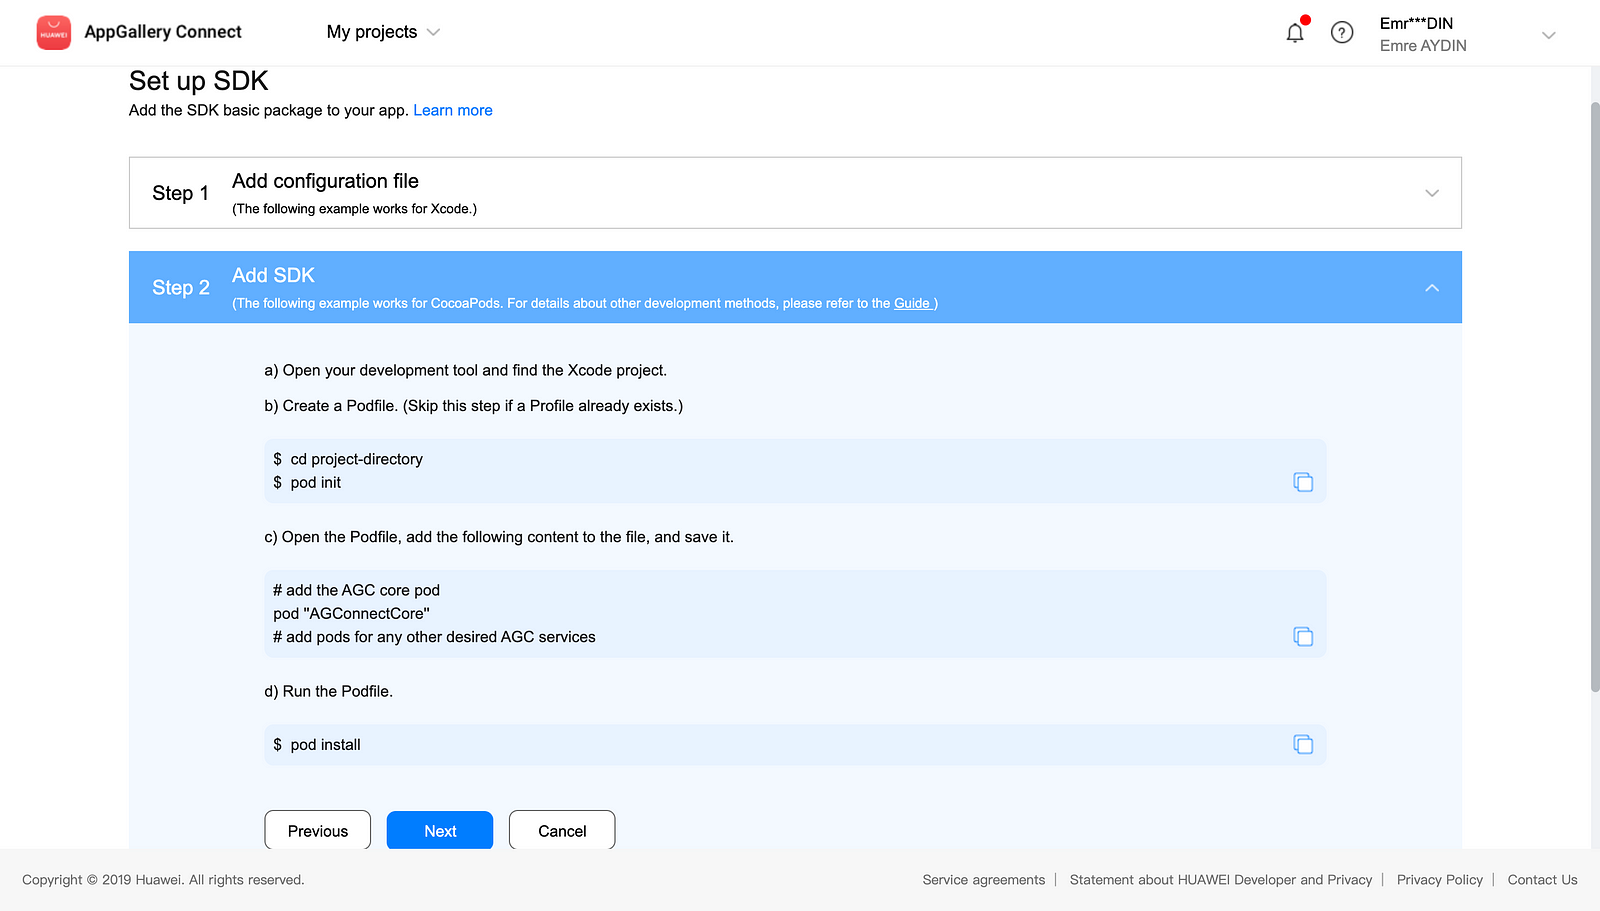
When you run pod install code, another file with .xcworkspace extension will be created. Open your project with using .xcworkspace file.
Congrats!, we successfully implemented the library and enabled Huawei Analytics.
By the way we also need to add an internet permission. To do this add following code into your Info.plist file.
Now, run the project and you are going to see a message in debug area:
To set analytics sdk log level, please set one of the following launch argument: “-HALogLevelDebug”, “-HALogLevelInfo”, “-HALogLevelWarn”, “-HALogLevelError”. This argument will take effect until it is replaced or removed.
We can able to enable the debug mode with:
Choose Product > Scheme > Edit Scheme from the Xcode menu. On the Arguments page, click + to add the -HALogLevelDebug parameter. After the parameter is added, click Close to save the setting.
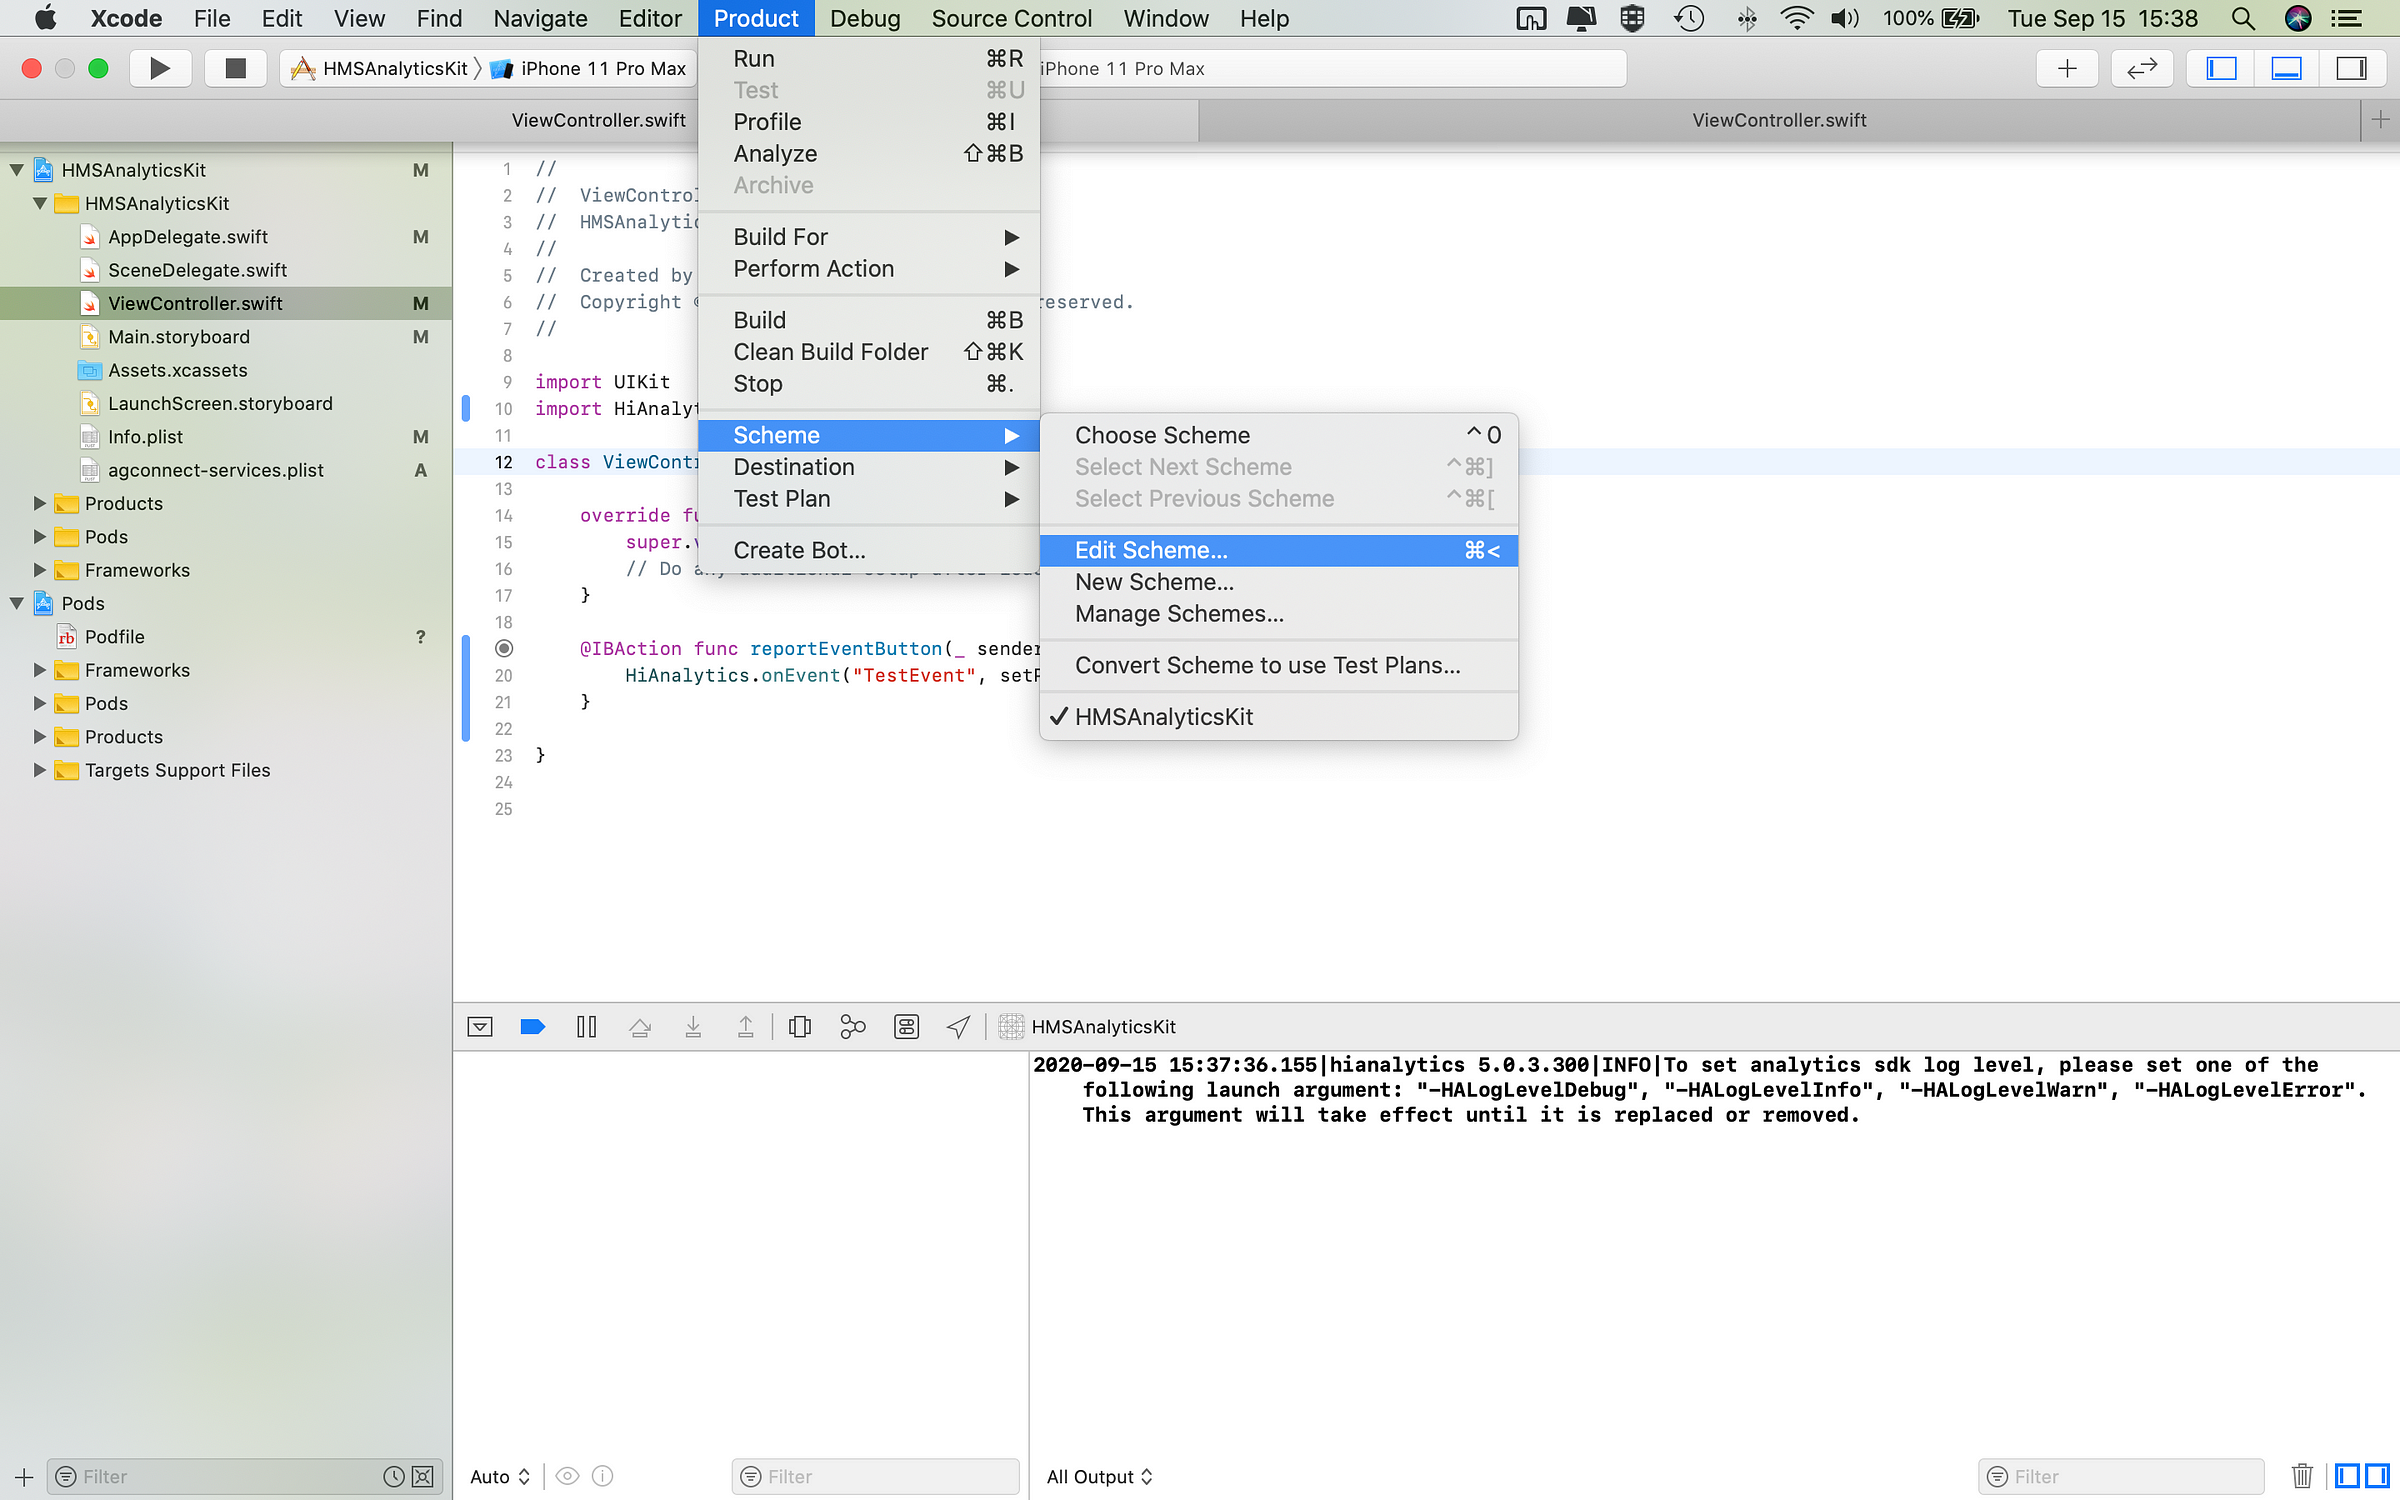
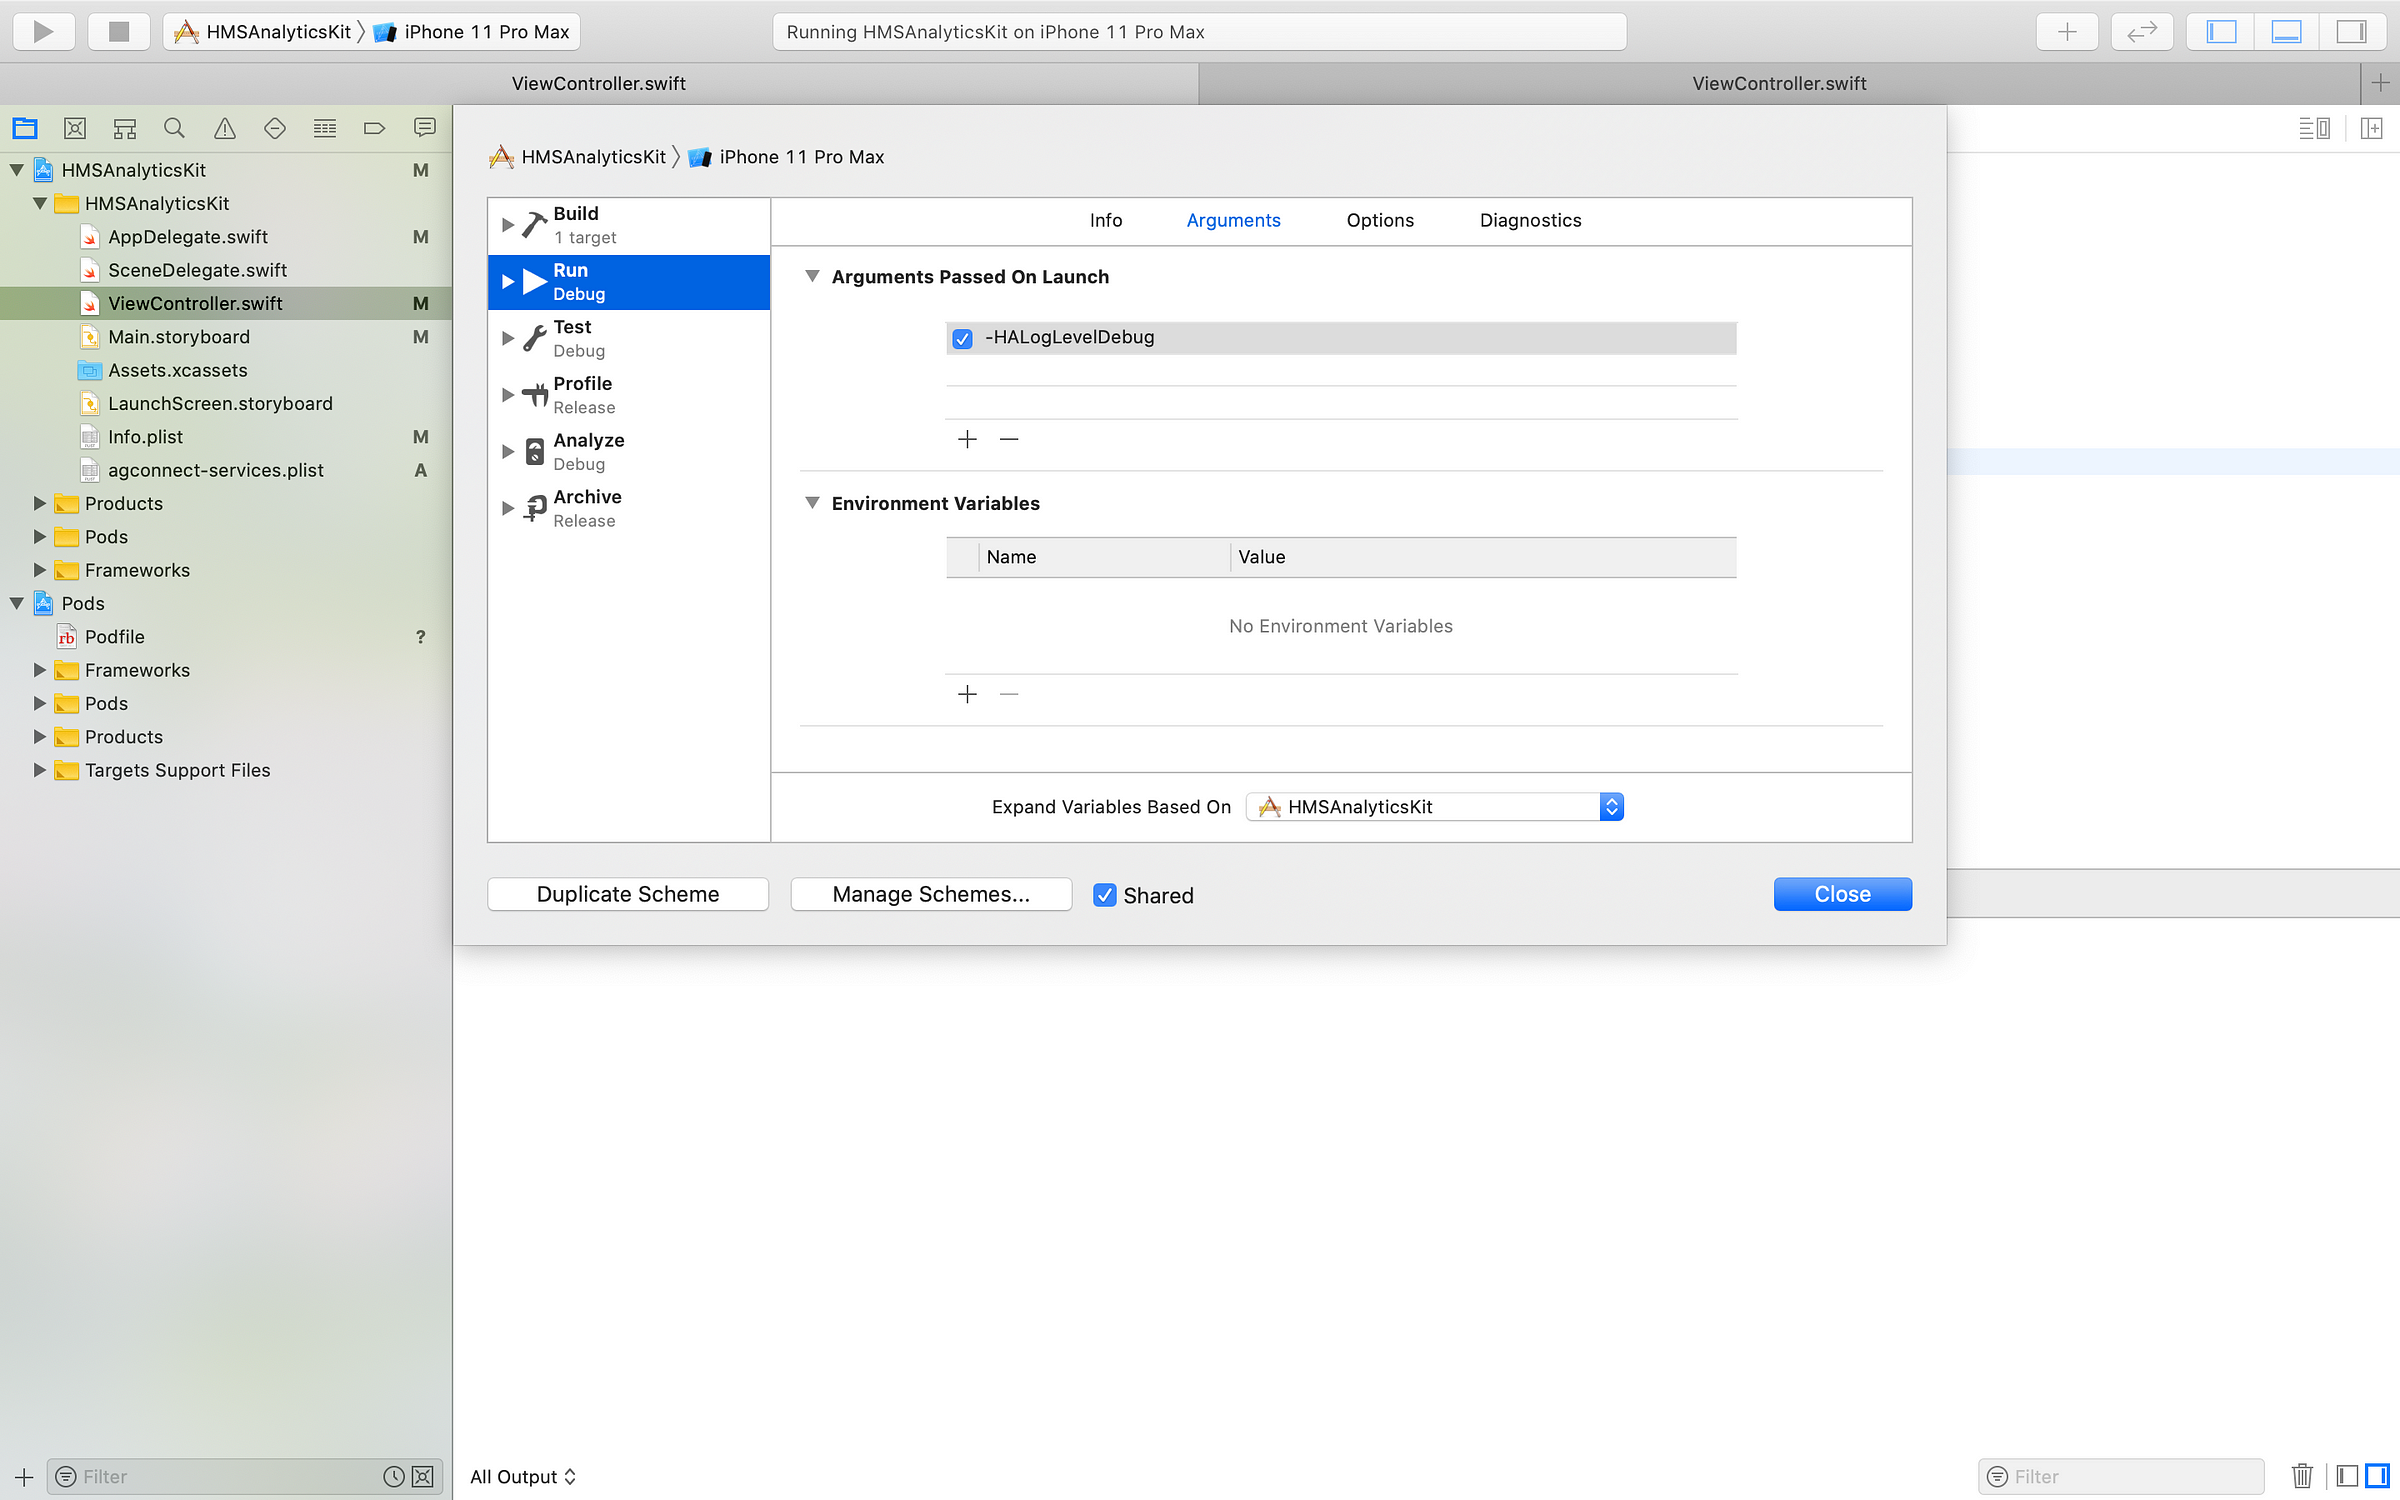
After adding the -HALogLevelDebug parameter to Arguments page, you are going to able to see the logs, as you can see on debug area in screenshot below.
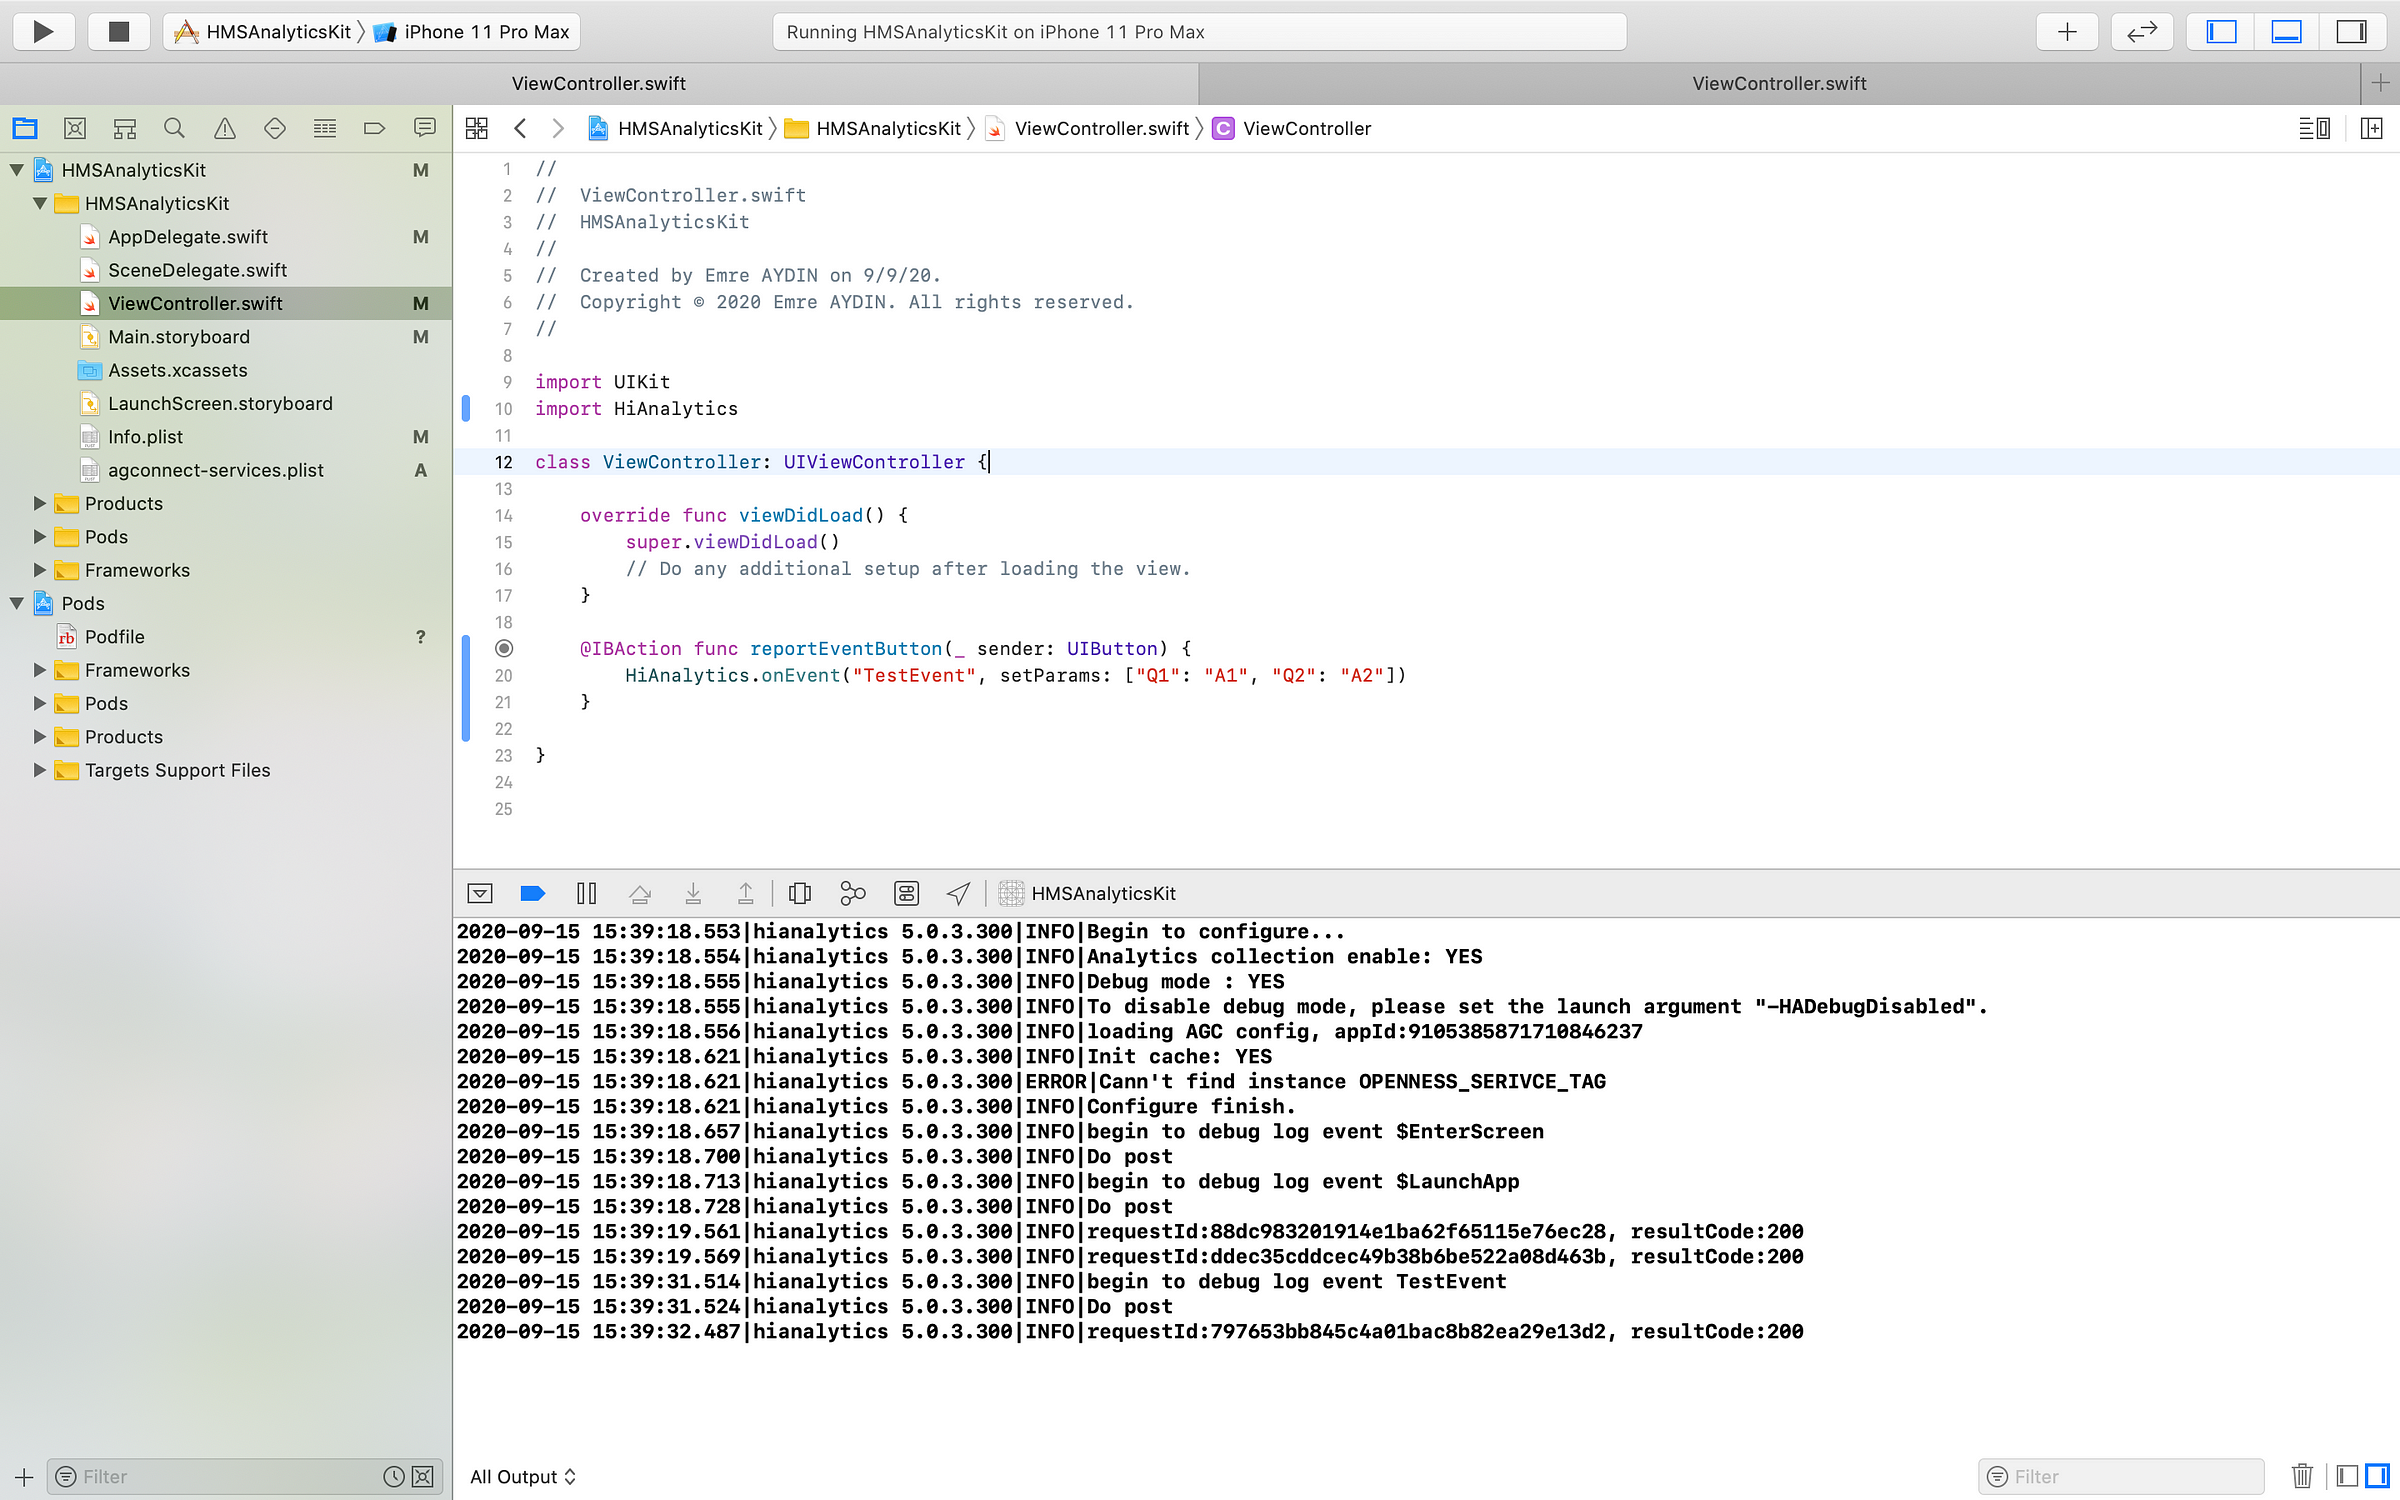
Finally, I will mention about one more thing. You can set custom events and send it with specific parameters. With this example code you can do it successfully.
You can check example code here: